Struggling to set up your WooCommerce store with Bricks Builder, even after digging into the official docs?
You’re definitely not alone.
I’ve been there myself, wrestling with confusing details and gaps while building my first store.
Setting up a WooCommerce store with Bricks can feel like piecing together a puzzle with some critical parts missing.
You know the core pages: Shop, Cart, Checkout, and My Account, have to be in place.
But what about the rest? Without clear guidance, it’s easy to end up with a site that feels unfinished or confusing, which can frustrate visitors and hurt your credibility.
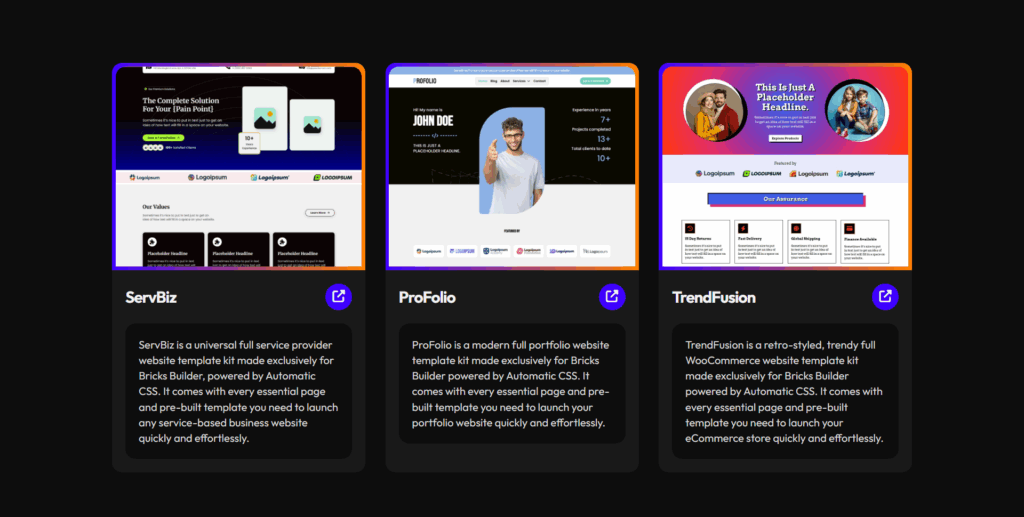
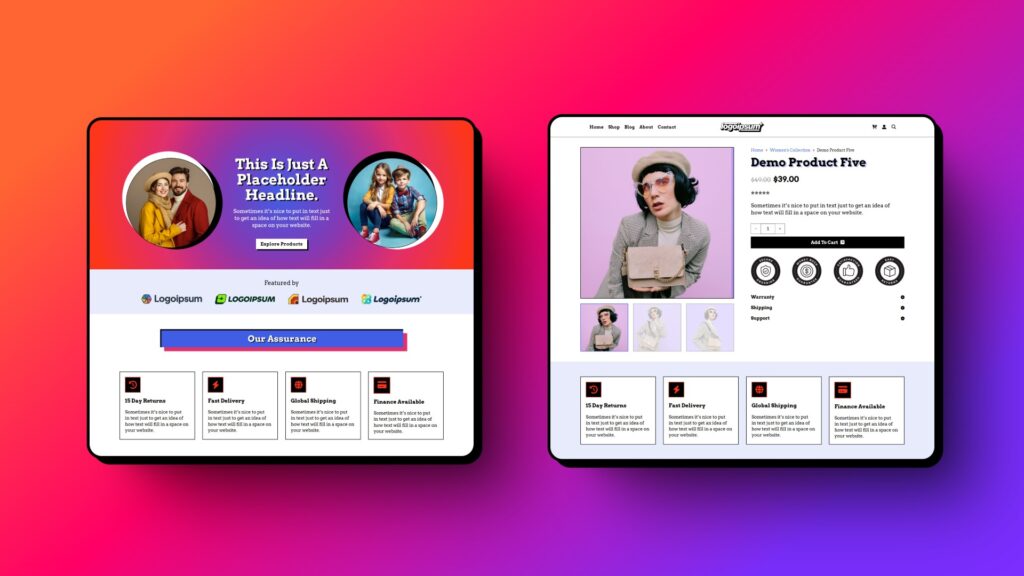
To make things easier for myself and the community, I created TrendFusion, a reusable full-site template kit you can grab, customize, and launch right away.
It’s designed as a ready-made blueprint so you can start your store with less hassle.
But I know many still want a clear checklist: what exactly do you need for a full WooCommerce site in Bricks, and how do you set it all up properly?
That’s why I put together this clear, no-fluff ultimate guide, spending my entire weekend.
It walks you through every essential page and template with straightforward, no-jargon steps to help your store work flawlessly and look professional from day one.
No more hunting for scattered advice or half-baked answers on Google or ChatGPT.
This is your one-stop resource to set up your Bricks-powered WooCommerce store confidently, without missing a thing.
Ready to get your WooCommerce structure right and skip the headaches? Let’s get started! And if you have questions, I’m always here to help.
TL;DR: Key Highlights
These key highlights offer a concise and clear overview designed for readers who want quick, actionable insights without reading the full post:
Essential Pages:
- Go to WordPress Dashboard > Pages > Add New to create each required page if it doesn’t exist.
- For Cart, Checkout, and My Account, paste their respective WooCommerce shortcodes into the content editor:
- Cart:
[woocommerce_cart] - Checkout:
[woocommerce_checkout] - My Account:
[woocommerce_my_account]
- Cart:
- Publish the pages.
- Visit WooCommerce > Settings > Advanced and assign each page in the Page setup section:
- Shop page
- Cart page
- Checkout page
- My Account page
- For optional pages like Homepage, About, and Contact, create and publish them as normal pages without shortcodes.
- Once pages are set up and assigned, WooCommerce will automatically use them for the corresponding processes.
Global Templates:
- Go to WordPress Dashboard > Bricks > Templates > Add New to create these.
- Create and assign templates for:
- Topbar (for promos and alerts)
- Header (normal and transparent styles)
- Footer (menus, social links, policies)
- Popups (exit-intent and timed)
- Use display conditions to control where each global template appears across the site.
Archive Templates:
- Create Product Archive templates for shop, product category, and tag archive pages.
- Optionally, build archives for blog posts, standard WordPress categories/tags, and search results.
Single Templates:
- Build a Single Product template to showcase product details, galleries, variants, reviews, and related items.
- Create a Single Blog Post template featuring full post content, comments, and related articles.
- Set up a Standard Page template for static pages like Privacy Policy or Terms of Use.
Other Important Templates:
- Cart Template for customized cart page layout.
- Checkout Template for optimized and branded checkout process.
- Account Dashboard Template and subpages covering Login/Register, Orders, Addresses, Edit Account, etc.
- Thank You / Order Confirmation Template displayed post-purchase.
- Optionally, create Search Results and 404 Error page templates.
How Pages & Templates Connect:
- Essential WooCommerce pages are the functional containers created and assigned in WordPress.
- Bricks Builder templates define how those pages look and behave.
- This separation allows you to control design precisely while keeping WooCommerce features intact.
By following this structure, creating key pages first and then designing matching templates, you lay a solid foundation for a seamless WooCommerce store powered by Bricks Builder.
Essential Pages in Bricks Builder for WooCommerce
To get your WooCommerce store up and running with Bricks Builder, the first step is making sure all the essential pages are created and assigned correctly.
These pages form the backbone of your store’s functionality; from browsing products to managing carts, checking out, and handling customer accounts.
Bricks doesn’t automatically create or style these pages for you, so it’s important to set them up manually in WordPress first.
Each core page, except for the shop page, typically uses WooCommerce shortcodes or built-in dynamic content to power its features.
We’ll give you a straightforward overview of what each page does and how to prepare it.
Since the visual design and detailed content are handled by custom templates, we’ll dive deeper into what to include and how to set up those templates in the upcoming sections.
Shop Page (Required)
The Shop page is the centerpiece of your online store.
It acts as the main product archive where all your items are displayed for customers to browse and explore.
WooCommerce creates this page automatically during setup and calls it “Shop” by default.
Unlike other pages, the Shop page doesn’t need a shortcode because WooCommerce dynamically loads product listings here.
How to Set Up the Shop Page:
- Go to WordPress Dashboard > Pages > All Pages and make sure a “Shop” page exists. WooCommerce usually creates it automatically.
- If missing, create a new page named “Shop” (no need to add shortcode).
- Open WooCommerce > Settings > Products > Page setup and confirm the Shop page is selected under Shop page.
- Publish or update the page to save the assignment.
Pro Tip: The default Shop page shows your products and categories using WooCommerce’s standard layout.
To give your store a unique look and boost user experience, building a custom Product Archive template with Bricks Builder is key.
I’ll walk you through how to set up this template in detail later in the article.
Cart Page (Required)
The Cart page is where your customers review the items they’ve added, update quantities, remove products, or move on to checkout.
It’s a critical step because the checkout process can’t begin without a functioning cart.
How to Set Up the Cart Page:
- Go to WordPress Dashboard > Pages > Add New if the Cart page doesn’t exist. Name it “Cart.”
- In the page editor, insert the shortcode
[woocommerce_cart]that generates the cart contents and functionality automatically. - Publish the page.
- Navigate to WooCommerce > Settings > Advanced > Page setup and assign this page as the Cart page.
Pro Tip: The default Cart page works fine but can feel basic and miss out on boosting conversions.
Creating a custom Cart template in Bricks Builder lets you simplify updates and highlight checkout buttons, making it easier for customers to complete their purchase.
We’ll cover how to set up your Cart template later in this article.
Checkout Page (Required)
The Checkout page is where your customers finalize their purchases by entering billing, shipping, and payment details.
It’s a crucial part of the buying journey, so keeping it clear and easy to use helps boost conversions and reduce cart abandonment.
How to Set Up the Checkout Page:
- Go to WordPress Dashboard > Pages > Add New if the Checkout page doesn’t already exist.
- Name the page “Checkout.”
- In the editor, add the shortcode
[woocommerce_checkout]to load the checkout form. - Publish the page.
- Open WooCommerce > Settings > Advanced > Page setup and assign this page as the Checkout page.
Pro Tip: The default checkout page works fine but can feel plain and slow down the buying process.
Creating a custom Checkout template in Bricks Builder lets you simplify the form, remove unnecessary fields, add trust signals, and give shoppers a smoother, more confident experience.
Plus, better mobile design and clear calls to action make completing orders easier. I’ll guide you step-by-step on how to set up your checkout template later in this article.
My Account Page (Required)
The My Account page is the central hub for your customers to register, log in, view their orders, manage addresses, and update personal details.
It plays a crucial role in keeping your customers engaged and making their shopping experience smooth and convenient.
How to Set Up the My Account Page:
- Go to WordPress Dashboard > Pages > Add New to create a new page named My Account if it doesn’t already exist.
- In the page editor, insert the shortcode
[woocommerce_my_account]to load the account dashboard and related sections dynamically. - Publish the page.
- Navigate to WooCommerce > Settings > Advanced > Page setup and assign this page as the My Account page.
- WooCommerce automatically handles subpages like Orders, Downloads, Addresses, and Account Details behind the scenes.
Pro Tip: Think of the My Account page as your store’s personal assistant; it makes it easy for customers to handle orders, addresses, and account details in one spot.
With Bricks, you can create a clean, friendly dashboard that’s a breeze to use and even add extra features (E.g., tabs or fields) if your store needs them.
A simple, intuitive design here encourages customers to come back. I’ll show you how to set up your custom Account templates later in this article.
Homepage (Optional)
Your homepage is often the first impression visitors get of your store.
While WooCommerce doesn’t create this page automatically, building a custom homepage is highly recommended to showcase your brand, highlight featured products, categories, and promotions, all tailored to engage and convert visitors.
How to Set Up the Homepage:
- Go to WordPress Dashboard > Pages > Add New and create a page titled “Home” or “Homepage.”
- Publish the page.
- Navigate to WordPress > Settings > Reading and set this page as your Front page.
- Use Bricks Builder’s visual editor to design your homepage from scratch:
- Combine WooCommerce product elements or query loop with rich content blocks like hero banners, text sections, and calls to action.
- Use dynamic product queries to showcase featured products and categories without needing WooCommerce shortcodes.
- Preview and adjust your layout to ensure it’s visually appealing and easy to navigate on all devices.
Pro Tip: Your homepage is like your store’s welcome mat; make it inviting and memorable.
Instead of showing just a standard product list, try mixing hero banners, product categories, and special offers to guide visitors naturally toward shopping.
With Bricks Builder, you have full creative control, so experiment with layouts that highlight your best products and unique brand voice.
About Page (Optional)
Your About page is where you share your story, mission, and values, helping visitors connect with your brand and build trust.
It’s a key part of any e-commerce site, giving customers a reason to choose you over competitors.
How to Set Up the About Page:
- Go to WordPress Dashboard > Pages > Add New to create a page titled “About” or “About Us.”
- Use Bricks Builder to design the page, ensuring your branding stays consistent.
- Add your company story, team bios, mission, and values to make it personal and engaging.
- No WooCommerce shortcode is needed since this is a regular WordPress page.
- Publish and link the page prominently in your site navigation.
Pro Tip: Your About page is your chance to build real connections.
Share authentic stories; not just facts and include visuals like behind-the-scenes photos or team videos to bring your brand to life.
Highlight key milestones, core values, and any press mentions that boost your credibility.
Keep the design clean and mobile-friendly to make it easy for visitors to read and explore.
Contact Page (Optional)
A Contact page is essential for providing support, handling inquiries, and building trust with your customers.
It makes it easy for visitors to reach you and reinforces your store’s credibility.
How to Set Up the Contact Page:
- Go to WordPress Dashboard > Pages > Add New and create a page titled “Contact.”
- Use Bricks Builder to design the page, add contact forms (via plugins like FluentForms or Bit Form), maps, phone numbers, and email addresses.
- No WooCommerce shortcode is needed since this is a standard WordPress page.
- Publish the page and link it clearly in your site’s navigation for easy access.
Pro Tip: Make your Contact page as simple and user-friendly as possible.
Use clear, accessible forms and include multiple ways for customers to reach you; like phone, email, and social media.
Embedding a map can help local customers find you easily.
Remember, a well-crafted Contact page boosts customer confidence and encourages engagement.
With all essential WooCommerce pages created and assigned, you now have a strong foundation.
Next, you’ll learn how to set up custom Bricks Builder templates that replace default WooCommerce layouts with fully branded, responsive pages tailored to your store’s unique style.
In the next section, we’ll dive into Global Templates, what they are, why you need them, and how to set them up inside Bricks Builder for your WooCommerce site.
Global Templates in Bricks Builder for WooCommerce
To create a seamless, professional shopping experience, your WooCommerce store needs consistent design elements that appear site-wide.
Global templates in Bricks Builder serve this purpose; they’re reusable building blocks like headers, footers, and popups that keep your branding uniform and navigation smooth across all pages.
Since Bricks Builder doesn’t offer pre-made WooCommerce global templates, being a professional WordPress builder that offers full flexibility, you’ll need to build and assign these foundational templates yourself.
Each of these templates ensures visitors have consistent access to navigation, branding, and shopper-friendly features no matter where they are on your site.
I’ll guide you through setting up these global templates step-by-step in Bricks Builder to get a truly unified WooCommerce store look and feel.
Header (Required)
Your header is the main navigation element that appears across your entire site, keeping your branding and menus consistent.
For WooCommerce stores, it’s common to use two header styles:
- Normal Header: Used on most pages, featuring your logo, main menu, search bar, and cart icon.
- Transparent Header: Used on visually rich pages like the homepage, shop, or about page, letting background images or banners show behind the navigation for a modern look.
How to Set Up Your Headers:
1. Create a New Header Template:
- Go to WordPress Dashboard > Bricks > Templates > Add New.
- Name your template (e.g., “Header – Normal” or “Header – Transparent” as you prefer).
- Select Header as the template type.
- Click Publish to save the new template.
2. Edit the Template with Bricks:
- Click Edit with Bricks to open the visual builder.
- Familiarize yourself with the interface before starting your design.
3. Add Dynamic Elements:
- Add your company logo for branding purposes.
- Insert the Menu element to build your site navigation.
- Add dynamic components such as the WooCommerce mini cart icon and a search bar for enhanced functionality.
- Arrange these elements logically for an intuitive user experience.
4. Style the Template for Your Brand:
- Customize fonts, colors, backgrounds, and spacing to align with your brand identity.
- Use Bricks’ responsive design controls to ensure your header looks polished on desktop, tablet, and mobile.
- To enable sticky behavior, in Template Settings (gear icon), go to the Header tab: activate Sticky header toggle and turn on Sticky on scroll, to keep it sticky remain on scrolling.
- Optionally, apply a semi-transparent background overlay to enable a transparent header effect only if you need a transparent header.
- If you are setting up a transparent header, then go to the Template Settings > Header tab > activate the Sticky header toggle and keep the Sticky on scroll deactivated to ensure the transparent header works properly.
5. Set Display Conditions:
- Open the Template Settings (gear icon) and navigate to the Conditions tab.
- Click Add Condition and select Entire Website to display the header everywhere or specify particular pages (e.g., all except those using a transparent header).
- Repeat for the Header – Transparent template, assigning it to pages like Homepage, Shop, and About, using appropriate conditions.
- Save your changes.
6. Save and Test:
- Confirm your header template is published and saved.
- Visit multiple pages and devices to verify the header displays and behaves as intended.
- Make styling or setting adjustments if needed to ensure a seamless user experience.
Pro Tip: Think of your headers as your store’s navigation command center.
Keep menus clear and easy to use, and place important elements like the mini cart icon where shoppers expect them.
Use the transparent header selectively on pages with striking visuals to create impact without compromising usability.
Always preview your headers on mobile devices to ensure menus and icons remain accessible.
Mastering these templates with display conditions lets you deliver a polished, consistent user experience from first click to checkout.
Footer (Required)
Your footer wraps up every page by providing important links and information that visitors rely on. It typically includes:
- Navigation menus for quick access to categories or key pages
- Social media icons linking to your profiles
- Legal links such as Terms of Use and Privacy Policy
- Contact information or newsletter signup
A well-designed footer reinforces your brand and helps visitors navigate your store seamlessly.
How to Set Up Your Footer Template:
1. Create a New Footer Template:
- Go to WordPress Dashboard > Bricks > Templates > Add New.
- Name your template Footer.
- From the Template Type dropdown, select Footer.
- Click Publish to save your new footer template.
2. Edit the Template with Bricks:
- Click Edit with Bricks to open the visual editor.
- Familiarize yourself with the Bricks interface before you start building.
3. Add Dynamic Elements:
- Use a Container element, or flexbox, or a grid to set up a multi-column layout for your footer.
- Add the Menu element to display your footer navigation links.
- Insert Icon elements for your social media profiles.
- Optionally, add a Text element for a copyright notice or legal links.
- Consider adding a newsletter signup form, back-to-top button, or trust badges for extra engagement.
- Rearrange and group each widget for logical flow: navigation, social links, and legal info.
4. Style the Template for Your Brand:
- Choose fonts, colors, spacing, and icon styles that reflect your brand identity.
- Use Bricks’ style controls to customize backgrounds, borders, and alignment.
- Preview your footer on desktop, tablet, and mobile views to ensure responsiveness.
- Keep the design clean, legible, and cohesive with your site’s overall look.
5. Set Display Conditions:
- In Bricks Builder, click the gear icon (Template Settings).
- Go to the Conditions tab.
- Set the display condition to Entire Site so your footer appears across all pages.
- Save the condition settings.
6. Save and Test:
- Click Save to publish your updated footer template.
- Visit your website on different devices and pages to check that the footer displays correctly and matches your branding.
Pro Tip: Keep your footer clean and organized; don’t overload it with too much info.
Prioritize important links and contact details, so visitors can find what they need without scrolling endlessly.
Consider adding a newsletter signup or quick contact form to boost engagement. Also, make sure your footer is fully responsive so it looks great on all devices.
A polished footer builds trust and encourages visitors to explore your store further.
Topbar (Optional)
A topbar is a slim strip that sits at the very top of your website, just above the header.
It’s a versatile space perfect for grabbing visitors’ attention with:
- Special promotions or sale announcements
- Important alerts, like free shipping thresholds
- Quick links to support, login, or contact information
Why It’s Important:
A well-placed topbar instantly highlights timely messages that can boost engagement and encourage shoppers to take action.
How to Set Up Your Topbar Template:
1. Create a New Section Template:
- Go to WordPress Dashboard > Bricks > Templates > Add New.
- Name your template Topbar.
- Select Section as the template type.
- Click Publish to save the new template.
2. Edit the Template with Bricks:
- Click Edit with Bricks to open the visual builder.
- Familiarize yourself with the interface before starting your layout.
- Design a simple horizontal strip using Containers or Columns to structure your topbar content.
3. Add Dynamic Elements:
- Add Text elements to display announcements or promotional messages.
- Insert Button or Link elements for quick access to important pages or offers.
- Include Icon elements for social media profiles or contact information to enhance user engagement.
- Optionally, configure the topbar as fixed or sticky so it remains visible during scrolling.
4. Style the Template for Your Brand:
- Customize fonts, colors, spacing, and backgrounds to align with your brand identity and overall website style.
- Use Bricks’ responsive design controls to ensure the topbar looks good on desktop, tablet, and mobile devices.
- Keep the design clean and unobtrusive while providing useful information.
5. Set Display Conditions:
- Click the gear icon (Template Settings) within Bricks Builder.
- Navigate to the Conditions tab.
- Set the display condition to Entire Site or specify particular WooCommerce pages where the topbar should appear, depending on your needs.
- In the Hook: Name field, enter “bricks_before_header” to position the topbar above the header.
- Set Hook: Priority to 10 or higher to control the execution order.
6. Save and Test:
- Click Save to publish your topbar template.
- Visit your website across different pages and devices to verify the topbar displays correctly and functions as intended.
- Adjust styling or conditions as needed to optimize user experience.
Pro Tip: Use your topbar sparingly to avoid overwhelming visitors; focus on one key message or offer at a time.
If you want to keep your header clean, the topbar is an ideal spot for announcements that need to stand out.
Also, consider mobile responsiveness, make sure your topbar looks good and stays unobtrusive on smaller screens.
With Bricks Builder, you have full control over when and where it appears, so test different display conditions to find what works best for your store.
Popups (Optional)
Popups are interactive overlays that capture visitors’ attention with targeted messages, offers, or calls to action.
When used thoughtfully in your WooCommerce store, pop-ups can boost conversions and reduce cart abandonment.
Common types include:
- Exit-intent popups: Triggered when a user tries to leave the site, offering discounts or special deals to keep them engaged.
- Timed popups: Appear after a delay, especially useful on mobile devices to gently prompt visitors to act.
How to Set Popup Display Triggers:
1. Create a New Popup Template:
- Go to WordPress Dashboard > Bricks > Templates.
- Click Add New to create a new pop-up template (e.g., name your template “Popup – Exit Intent” or “Popup – Timed”).
- Select Popup as the template type from the dropdown.
- Click Publish to save the new pop-up template.
2. Edit the Template with Bricks:
- Click Edit with Bricks to launch the visual builder.
- Familiarize yourself with the Bricks interface and open your pop-up template layout.
3. Add Dynamic Elements:
- Design your pop-up content with elements like text, images, buttons, or forms as needed.
- Ensure your pop-up message is clear and concise to encourage user interaction.
4. Style the Template for Your Brand:
- Customize fonts, colors, backgrounds, and spacing to match your branding.
- Use Bricks’ responsive controls to make sure the pop-up looks great on all devices.
- Keep the design balanced; not too intrusive but attention-grabbing.
5. Set Display Conditions:
- In the Bricks editor, click the gear icon (Template Settings) at the top right.
- Switch to the Popup tab to access popup-specific options.
- Under Interactions, set up the triggers for your pop-up:
- Exit Intent: shows a pop-up when a user’s cursor moves to close or leave the page.
- Time Delay: shows a pop-up after a set number of seconds on the page.
- On Click / Manual Trigger: a pop-up appears when a visitor clicks a designated button or icon.
- Optionally, select device targeting under Breakpoints (desktop, mobile, or both).
- Go to the Conditions tab in Template Settings.
- Click Add Condition to specify where the pop-up should appear, for example:
- Entire Site (all pages)
- Singular Pages (specific pages like product, cart, or checkout)
- Archives (product category or tag pages)
- Add multiple conditions as needed to refine targeting and reduce disruption.
6. Save and Test:
- Click Save to finalize all settings and publish your pop-up template.
- Visit your website’s live pages on different devices and triggers to confirm pop-ups appear correctly and function as intended.
- Adjust styling, triggers, or conditions as needed to optimize user experience.
Pro Tip: Popups are powerful but can easily become annoying if overused.
Focus on one clear, valuable message per popup and avoid interrupting the shopping flow too often.
Exit-intent popups work well to retain leaving visitors, while timed popups nudge engagement gently. Make sure your popups are mobile-friendly and easy to close.
To maximize results, combine Bricks’ popup features with WooCommerce data for precise targeting.
Next, we’ll dive into building WooCommerce-specific archive templates to complete your store’s visual framework.
Archive Templates in Bricks Builder for WooCommerce
Archives templates are crucial for organizing and displaying collections of products or blog posts on your WooCommerce site.
Since Bricks Builder doesn’t provide archive templates out of the box, you need to create these templates yourself to ensure your product listings, categories, tags, and search results are presented cleanly and intuitively.
Here’s an overview of the essential and optional WooCommerce archive templates you should create in Bricks, what each template does, and how to set them up effectively.
Product Archive (Required)
Your Product Archive template is the backbone of your store; this is where shoppers discover all your products, whether they’re browsing your main Shop page or filtering by category or tag.
A well-crafted product archive helps visitors explore your offerings easily, navigate by category, and quickly find what they’re looking for.
How to Set Up Your Product Archive Template:
1. Create a New Product Archive Template:
- Go to WordPress Dashboard > Bricks > Templates > Add New.
- Name your template (e.g., “Product Archive”).
- From the Template Type dropdown, select WooCommerce – Product Archive (this option is visible only when WooCommerce is active).
- Click Publish to save the new template.
2. Edit the Template with Bricks:
- Click Edit with Bricks to open the visual editor.
- Familiarize yourself with the Bricks interface before building your layout.
3. Add Dynamic Elements:
- Add the Products element to display your product grid dynamically.
- Insert a Post Title element or add a Heading with the Archives dynamic tag to show the current page title, like “Shop.”
- Add the Breadcrumbs element to help users navigate back to higher-level categories or the homepage.
- Optionally, include the Products Archive Description element to display the shop page content or category descriptions.
- Consider adding elements such as filters or sorting controls to improve product browsing.
4. Style the Template for Your Brand:
- Customize fonts, colors, spacing, and backgrounds for clarity and brand consistency.
- Use Bricks’ responsive controls to ensure the archive looks great on desktop, tablet, and mobile.
- Keep the design clean and easy to navigate, emphasizing product visibility.
5. Set Display Conditions:
- In the Bricks editor, click the gear icon (Template Settings).
- Navigate to the Conditions tab.
- Assign this template to the Shop page or other relevant product archive pages so it replaces the default WooCommerce product listing.
6. Save and Test:
- Click Save to publish your product archive template.
- Visit your Shop page and other product archive pages on different devices to confirm the template displays correctly and reflects your brand styles.
- Adjust styles or layout if needed for the best user experience.
Pro Tip: Think of your Product Archive page as your store’s showroom; it should make browsing effortless.
Keep layouts clean with easy-to-scan product grids and clear navigation using breadcrumbs and titles.
Adding sorting and filter options will help customers find favorites faster.
Take advantage of Bricks Builder’s WooCommerce elements to build a seamless, branded experience that truly feels like your store.
Product Taxonomy Archive (Required)
Product Taxonomy Archives include Product Category, Product Tag, and other taxonomy archive pages.
These pages automatically filter and display products by a specific category or tag.
Your goal is to build a custom Product Taxonomy Archive template that applies to these taxonomy archives, ensuring a consistent, branded experience.
How to Set Up Your Product Taxonomy Archive Template:
1. Create a New Product Taxonomy Archive Template;
- Go to WordPress Dashboard > Bricks > Templates > Add New.
- Name your template (e.g., “Product Taxonomy Archive”).
- From the Template Type dropdown, select WooCommerce – Product Archive (this option appears only when WooCommerce is active).
- Click Publish to save the new template.
2. Edit the Template with Bricks:
- Click Edit with Bricks to open the visual editor.
- Familiarize yourself with the interface before building your layout.
3. Add Dynamic Elements:
- Insert a Post Title element or a Heading, then set its content to the dynamic tag Archives to automatically display the current category or tag title.
- Add the Products element to dynamically display the product grid filtered by the current taxonomy.
- Include a Breadcrumbs element to help users navigate back to parent categories or the homepage.
- Optionally, add the Products Archive Description element to show the category or tag description for additional context.
4. Style the Template for Your Brand:
- Design the archive layout with consistent spacing, fonts, and colors that reflect your brand.
- Arrange the product grid for easy browsing and clear visibility.
- Use Bricks’ responsive design controls to ensure the template looks great on desktop, tablet, and mobile devices.
- Keep the layout clean and user-friendly.
5. Set Display Conditions;
- Inside the Bricks editor, click the gear icon (Template Settings).
- Navigate to the Conditions tab.
- Assign the template by selecting Archive > set Archive Type to Categories & Tags > then, in Archive Terms, select All Terms (Product Categories), All Terms (Product Tags), and any other taxonomy terms as needed. This ensures the custom template replaces WooCommerce’s default pages for these taxonomies.
- Save the settings.
6. Save and Test:
- Click Save to publish your product taxonomy archive template.
- Preview various product category and tag archive pages on your live site to confirm your branding and layout appear correctly.
- Test responsiveness and usability on different devices.
- Adjust styling or structure as needed for the best user experience.
Pro Tip: Think of your Product Taxonomy Archives as curated shop windows tailored to specific customer interests.
Make sure they clearly communicate the category or tag purpose with bold titles and helpful descriptions.
Use product grids that are easy to scan, letting shoppers quickly find what they want.
Breadcrumbs keep navigation simple, minimizing frustration.
A clean, consistent design here reinforces trust and encourages exploration, making your store feel more professional and welcoming.
Blog Archive (Optional)
If you run a blog alongside your WooCommerce store, having a well-organized archive template is essential to showcase your posts clearly and consistently with your brand.
How to Set Up Blog Archive Template:
1. Create a New Archive Template:
- Go to WordPress Dashboard > Bricks > Templates > Add New.
- Name your template (e.g., “Blog Archive”).
- From the Template Type dropdown, select Archive (standard WordPress archive type).
- Click Publish to save the template.
2. Edit the Template with Bricks:
- Click Edit with Bricks to open the visual builder.
- Familiarize yourself with the interface before building your layout.
3. Add Dynamic Elements:
- Add a Post Title element and set its content to the dynamic tag Archives to display the current blog category name or “Blog” for the main archive.
- Insert a Posts element to dynamically list your blog posts in grid or list format.
- Include Breadcrumbs and Pagination elements to help visitors navigate content easily.
- Consider adding a search bar or filtering options to help visitors find posts faster.
4. Style the Template for Your Brand:
- Customize fonts, colors, spacing, and backgrounds to match your brand identity.
- Ensure the layout is clean, readable, and easy to navigate on desktop and mobile devices.
- Use Bricks’ responsive controls to adjust the design for all screen sizes.
5. Set Display Conditions:
- Click the gear icon (Template Settings) in Bricks Builder.
- Navigate to Settings > Template Settings > Conditions.
- Assign the template to your blog archive pages, such as the main blog page.
- Save the settings.
6. Save and Test:
- Click Save to publish your blog archive template.
- Visit your blog archive pages across different devices to verify correct display and functionality.
- Adjust styles or layout as needed for the best user experience.
Pro Tip: Think of your Blog Archive as your blog’s front window; it should invite visitors to explore more content.
Keep the layout simple and organized, using clear section headings and intuitive navigation so readers can find topics that interest them effortlessly.
Incorporate pagination and search to guide visitors through your posts without getting overwhelmed.
With Bricks Builder, you have complete control to design an archive that feels like part of your store, strengthening your brand’s voice across every page.
Standard Archive (Optional)
Standard archives in WordPress include category, tag, and other archive pages that organize blog posts or custom post types by taxonomy.
These pages help visitors filter and discover content easily, providing structured navigation across your site.
How to Create Your Standard Archive Template:
1. Create a New Archive Template:
- Go to WordPress Dashboard > Bricks > Templates > Add New.
- Name your template (e.g., “Standard Archive”).
- From the Template Type dropdown, select Archive (standard WordPress archive type).
- Click Publish to create and save the template.
2. Edit the Template with Bricks:
- Click Edit with Bricks to open the visual builder.
- Familiarize yourself with the interface before beginning your design.
3. Add Dynamic Elements:
- Add a Post Title element and set its content to the dynamic tag Archives. This dynamically displays the current category or tag name (e.g., “News” or “Tips”).
- Insert a Posts element to list blog posts dynamically in a clean grid or list layout.
- Add Breadcrumbs to help users navigate back to higher-level pages.
- Include Pagination to enable browsing through multiple pages of posts.
4. Style the Template for Your Brand:
- Customize fonts, colors, spacing, and layout elements to match your site’s visual identity.
- Use Bricks responsive controls to ensure the archive looks great on desktop, tablet, and mobile devices.
- Keep the design clean, readable, and easy to navigate.
5. Set Display Conditions:
- Click the gear icon in Bricks Builder to open Template Settings.
- Navigate to Settings > Template Settings > Conditions.
- Assign the template by selecting Archive > Archive Type set to Categories & Tags > then, in Archive Terms, select All Terms (Categories), All Terms (Tags), and any other taxonomy terms as needed. This ensures the custom template replaces WordPress’s default pages for these taxonomies.
- Save your settings to activate the template.
6. Save and Test:
- Click Save to publish your archive template.
- Visit different category and tag archive pages on your site to ensure the template applies correctly and looks polished across devices.
- Adjust styling or layout if needed for the best user experience.
Pro Tip: Think of the Standard Archive as a clean, easy-to-browse library shelf showcasing all your blog posts by topic.
Use clear headings and ample spacing to help readers scan content quickly.
Breadcrumbs and pagination improve user experience by making navigation intuitive.
Keep the design simple and consistent with your brand to create a seamless journey between your blog and store.
Search Results Archive (Optional)
A well-designed Search Results template helps your users quickly find the products, posts, or pages that match their search queries.
It makes the search experience smooth and user-friendly by presenting relevant results clearly and offering helpful messaging when no results appear.
How to Set Up Your Search Results Template:
1. Create a New Search Results Template:
- Go to WordPress Dashboard > Bricks > Templates > Add New.
- Name your template (e.g., “Search Results”).
- Select Search Results as the template type.
- Click Publish to save the new template.
2. Edit the Template with Bricks:
- Click Edit with Bricks to open the visual builder.
- Familiarize yourself with the interface before starting your design.
3. Add Dynamic Elements:
- Insert a Heading element near the top of the template.
- Add a Posts element to display search results.
- Configure the Posts element to show multiple post types, including WooCommerce products and blog posts, ensuring all relevant items appear together.
- Add a No Results message inside the query loop No Results section, with clear wording like “Sorry, no results found. Please try another search.” Ensure this message is visible but unobtrusive.
4. Style the Template for Your Brand:
- Use Bricks Builder’s design tools to style the posts grid or list for readability and visual consistency with your brand.
- Customize fonts, colors, spacing, and layouts to align with your site’s style.
- Make sure the layout is fully responsive and looks good across desktop, tablet, and mobile devices.
5. Set Display Conditions:
- Click the gear icon in Bricks Builder to open Template Settings.
- Navigate to Settings > Template Settings > Conditions.
- Assign this template to the Search Results condition so it replaces the default WordPress search results page.
6. Save and Test:
- Click Save to publish your search results template.
- Perform several test searches on your website to verify that the search results display properly.
- Confirm the dynamic heading updates with the search term, and the no-results message shows correctly when there are no matches.
- Check the design on various devices and make adjustments if necessary.
Pro Tip: Make your search results page feel welcoming and helpful.
Including the searched term in the heading reassures users they’re in the right place.
If you expect large product catalogs or extensive blog content, consider adding filter or sorting options to let users refine search results easily.
Also, keep the “No results” message friendly and suggest alternatives, like links to popular products or a site map, to guide users back into your store.
By leveraging dynamic WooCommerce queries and Bricks’ template conditions, you can build flexible, beautiful archive pages that drive engagement and sales.
Next, we’ll dive into crafting Single Templates, which are vital for showcasing individual products and content in your store.
Single Templates in Bricks Builder for WooCommerce
When building a WooCommerce store with Bricks Builder, creating powerful single templates is essential to showcase your products and content effectively.
These templates control the detailed pages visitors interact with one product or one blog post at a time while maintaining your site’s branding and user experience consistency.
Below, I explain the three main single templates you need: the Single Product Template, the Single Blog Post Template, and a Standard Page Template for generic content like policies.
For each, you’ll learn what it includes and how to set it up in Bricks Builder.
Single Product Template (Required)
Your Single Product template is the detailed layout that appears on every individual product page.
This is where shoppers examine product images, pricing, options, stock status, and reviews; all crucial elements that turn interest into a purchase.
How to Set Up Your Single Product Template:
1. Create a New Single Product Template:
- Go to WordPress Dashboard > Bricks > Templates > Add New.
- Name your template (e.g., “Single Product”).
- From the Template Type dropdown, select WooCommerce – Single Product (this option appears only if WooCommerce is installed and active).
- Click Publish to save the new template.
2. Edit the Template with Bricks:
- Click Edit with Bricks to launch the visual editor.
- Familiarize yourself with the interface before building your product page layout.
3. Add Dynamic Elements:
- Use WooCommerce-specific elements such as Product Title, Product Gallery, Product Price, Add to Cart, and others found in the left panel.
- Arrange these elements to match your desired design; for example, place the Product Gallery on the left and product details like title, price, variations, and add to cart on the right.
- Include product data that updates dynamically for each product page.
4. Style the Template for Your Brand:
- Customize fonts, colors, spacing, and backgrounds using Bricks’ design tools to align with your brand identity.
- Make sure each element’s style supports readability and a seamless user experience.
- You may need to write custom CSS to style the dynamic post content.
5. Add Additional Sections:
- Include Product Tabs to display Description, Additional Information, and Reviews.
- Add Related Products or Upsells sections to encourage further purchases and increase engagement.
6. Set Display Conditions:
- Click the gear icon (Template Settings) in Bricks Builder.
- Navigate to Settings > Template Settings > Conditions.
- Assign this template’s post type condition to Product so it replaces WooCommerce’s default single product pages.
7. Save and Test:
- Save your template to publish it.
- Visit various product pages on your site to verify that the template applies correctly and dynamically displays the right product information.
- Test across different devices and browsers for consistency.
- Make any necessary styling or layout adjustments for optimal presentation.
Pro Tip: Think of your Single Product page as your store’s personalized showcase.
Use a clean, balanced layout that highlights important information without overwhelming shoppers.
Position product images and key details where visitors naturally look; typically, images on the left and product info on the right.
Keep calls-to-action, like Add to Cart, prominent and visually distinct.
Remember to test your template on mobile devices to ensure it looks and works perfectly everywhere.
This tailored experience builds shopper confidence and drives conversions.
Standard Page Template (Required)
A Standard Page template is fundamental for presenting your static informational pages, like Privacy Policy, Terms of Use, About, or any general content pages.
It ensures a cohesive look and feel across these core pages, reinforcing your site’s professionalism and readability.
How to Set Up Your Standard Page Template:
1. Create a New Single Page Template:
- Go to WordPress Dashboard > Bricks > Templates > Add New.
- Name your template (e.g., “Standard Page Template”).
- From the Template Type dropdown, select Single.
- Click Publish to save the new template.
2. Edit the Template with Bricks:
- Click Edit with Bricks to open the visual editor.
- Familiarize yourself with the interface before starting your design.
3. Add Dynamic Elements:
- Insert a Page Title element to dynamically display the current page’s title.
- Add a Page Content element to render the main content from the WordPress editor.
- Optionally, add sidebars, call-to-action blocks, or other sections as needed, ensuring they complement your page content.
4. Style the Template for Your Brand:
- Keep the layout clean and versatile to accommodate various page types.
- Customize fonts, colors, spacing, and backgrounds to align with your brand identity.
- Ensure the design maintains consistency and readability across all devices using Bricks’ responsive controls.
5. Set Display Conditions:
- In Bricks Builder, click the gear icon to open Template Settings.
- Go to the Conditions tab.
- Add a condition to assign this template to all standard WordPress pages in the Post type.
- Make sure to exclude special WooCommerce pages or blog post templates with a separate condition if applicable.
- Save the settings to activate the template site-wide for regular pages.
6. Save and Test:
- Click Save to preserve your template and design.
- Preview multiple standard pages on your website to confirm the template applies correctly and the styling matches your branding.
- Adjust layout or styles as needed to enhance user experience.
Pro Tip: Think of your Standard Page template as the foundation for your most important informational pages.
Keeping it simple and clean ensures that visitors can focus on the content without distractions.
Use consistent typography and spacing for easy reading, and consider adding subtle design accents like dividers or call-to-action buttons to gently guide users.
Since this template will be used across many important pages, maintaining a uniform style builds trust and makes your site feel polished and professional.
Single Blog Post Template (Optional)
Your Single Blog Post template controls the layout and presentation of every individual blog post on your WooCommerce site.
It ensures that each article is engaging, easy to read, and consistent with your brand style, helping keep readers interested and encouraging interaction.
How to Set Up Your Single Blog Post Template:
1. Create a New Single Post Template:
- Go to WordPress Dashboard > Bricks > Templates > Add New.
- Name your template (e.g., “Single Blog Post”).
- From the Template Type dropdown, select Single.
- Click Publish to save the new template.
2. Edit the Template with Bricks:
- Click Edit with Bricks to open the visual editor.
- Familiarize yourself with the interface and prepare to build your blog post layout.
3. Add Dynamic Elements:
- Insert a Post Title element and set it to display the dynamic post title.
- Add a Post Content element to render the full article content from the WordPress editor.
- Insert a Comments element or use a shortcode to enable visitor interaction on the post.
- Consider including author bio, social sharing buttons, or call-to-action blocks to increase engagement.
- Optionally, add a Related Posts section:
- Set up a Post Query loop filtered by the current post’s categories or tags.
- Display related post titles or excerpts to encourage further reading.
4. Style the Template for Your Brand:
- Design the layout to prioritize readability with clear typography, appropriate spacing, and a clean structure.
- Customize fonts, colors, and spacing to reflect your brand identity.
- Ensure the template is fully responsive and looks great on desktop, tablet, and mobile devices.
5. Set Display Conditions:
- In the Bricks editor, click the gear icon to open Template Settings.
- Navigate to Settings > Template Settings > Conditions.
- Assign this template to apply to Post under Post type, so all blog posts use this layout.
- Save your changes.
6. Save and Test:
- Click Save to publish your single post template.
- Visit multiple blog posts on your site to verify the template applies correctly and displays dynamic content.
- Test on various devices to ensure responsiveness.
- Adjust styles or layout if necessary for optimal user experience.
Pro Tip: Think of your Single Blog Post template as your story’s stage.
Use clean, focused design that lets your content shine and keeps readers engaged without distractions.
Including related posts helps reduce bounce rates by guiding visitors to more content they’ll enjoy. Always test your template on mobile for smooth reading and easy interaction.
With Bricks Builder, you can effortlessly tailor every blog post page to strengthen your brand and connect with your audience.
These single templates are fundamental pieces of your WooCommerce site built with Bricks Builder.
They empower you to tailor every product page, blog post, and generic page with precision, enhancing usability, brand identity, and conversion potential.
Next, we’ll explore other important templates specific to WooCommerce user accounts, checkout payments, and more to complete your store’s user journey.
Other Important WooCommerce Templates in Bricks Builder
Earlier, we covered creating the essential WooCommerce pages like Cart, Checkout, and My Account pages.
Those pages serve as containers in WordPress that WooCommerce recognizes and uses for its core functionalities.
Now, to fully control the appearance and layout of those pages, and many others, you need to create custom templates in Bricks Builder and assign them correctly.
This bridges the static pages you created with the dynamic WooCommerce shortcodes.
Below, we detail these critical templates, how they connect to your pages, and a step-by-step guide to setting them up in Bricks Builder.
Cart Template (Required)
Your Cart Template shapes the entire shopping cart experience, giving customers a clear, branded place to review products, update quantities, remove items, and continue on to checkout.
By building a custom Cart Template in Bricks, you replace WooCommerce’s generic layout with a user-friendly design that matches your store’s unique style.
How to Set Up Your Cart Template:
1. Create a New Cart Template:
- Go to WordPress Dashboard > Bricks > Templates > Add New.
- Name your template (e.g., “Cart Page”).
- From the Template Type dropdown, select WooCommerce – Cart.
- Click Publish to save the new template.
2. Edit the Template with Bricks:
- Click Edit with Bricks to open the visual builder.
- Familiarize yourself with the interface before design.
3. Add Dynamic Elements:
- Drag the Cart element to display the cart contents dynamically.
- Add supplementary elements as needed:
- Cart Totals: Shows order summary, taxes, and totals.
- Continue Shopping Button: Encourages users to browse more products.
- WooCommerce Notices: Displays real-time feedback like “Cart updated” or error messages.
- Consider adding trust badges near the cart totals for added customer confidence.
4. Style the Template for Your Brand:
- Customize colors, fonts, spacing, and button styles to match your brand identity.
- Ensure all buttons and messages are clear, visible, and accessible.
- Use responsive design controls to guarantee a good appearance on desktop, tablet, and mobile.
5. Set Display Conditions:
- In Bricks Builder, you don’t need to assign any display conditions for the cart template, as this template type is automatically rendered on the correct page, usually the page containing the
[woocommerce_cart]shortcode. - Save your settings.
6. Save and Test:
- Click Save to publish your cart template.
- Visit your site’s Cart page to ensure the template displays correctly.
- Test dynamic elements, styling, and responsiveness across devices.
- Adjust design or settings as needed for optimal user experience.
Pro Tip: Make your cart page effortlessly clear.
Keep the layout clean, highlight the checkout button, and make quantity adjustments or removals intuitive.
Prominently display WooCommerce messages for changes in the cart to build user confidence.
Always test the cart on desktop and mobile so customers can complete purchases smoothly from any device.
Empty Cart Template (Required)
The Empty Cart Template in Bricks Builder lets you create a custom layout that displays when a user’s WooCommerce cart is empty.
Instead of showing a generic message, you can design a branded, user-friendly screen that encourages visitors to keep browsing or shopping.
This template type automatically triggers on the cart page with no additional display conditions required.
How to Set Up Your Empty Cart Template:
1. Create a New Empty Cart Template:
- Open your WordPress Dashboard.
- Go to Bricks > Templates > Add New.
- Name the template clearly, such as “Empty Cart”.
- From the Template Type dropdown, select WooCommerce – Empty Cart.
- Click Publish to create the template shell.
2. Edit the Template with Bricks:
- Click Edit with Bricks to launch the visual builder.
- Familiarize yourself with the interface if you are new to Bricks.
- Design a welcoming, clear message like “Your cart is currently empty.”
- Add a button or link back to the Shop or Homepage to encourage further browsing.
- Use containers and layout elements for clean structure and focused messaging.
3. Add Dynamic Elements:
- Insert a Text element with a dynamic shortcode or custom message for the empty cart state.
- Add navigation buttons dynamically linked to product categories or the shop page.
- Avoid adding product lists or cart items since this template only applies when the cart is empty.
4. Style the Template for Your Brand:
- Customize fonts, colors, spacing, and backgrounds to match your brand identity.
- Make the empty cart message friendly and prominent without overwhelming.
- Style buttons in your brand colors with hover effects to increase engagement.
- Ensure responsive design for seamless appearance on all devices.
5. Set Display Conditions:
- Open Template Settings by clicking the gear icon in the Bricks editor.
- Note that WooCommerce – Empty Cart templates do not require manual display conditions; they automatically display when the cart is empty.
- Confirm your template is published and active.
6. Save and Test:
- Save your template inside Bricks Builder.
- Visit your site’s Cart page with an empty cart to ensure the template displays correctly.
- Test responsiveness on multiple devices and browsers.
- Adjust styling or layout as needed to optimize user experience.
Pro Tip: Add personalized messaging or product recommendations in your empty cart template to engage visitors and encourage further shopping.
Friendly, helpful language combined with clear calls to action makes your empty cart feel like an opportunity rather than a dead end.
This can improve retention and increase conversions in your WooCommerce store.
Checkout Template (Required)
The Checkout Template is where your customers enter billing and shipping details, choose payment options, and review their order before completing the purchase.
Creating a dedicated template in Bricks Builder helps you design a smooth, branded, and conversion-friendly checkout experience.
How to Set Up Your Checkout Template:
1. Create a New Checkout Template:
- Navigate to WordPress Dashboard > Bricks > Templates > Add New.
- Name your template (e.g., “Checkout Page”).
- Select WooCommerce – Checkout as the template type.
- Click Publish to save the new template.
2. Edit the Template with Bricks:
- Click Edit with Bricks to launch the visual editor.
- Familiarize yourself with the interface before building your checkout layout.
3. Add Dynamic Elements:
- Insert the Checkout Customer Details element to render all billing, shipping, and payment fields dynamically.
- Add elements specific to the checkout process, such as Checkout Login, Checkout Order Review, and a Notice if needed.
- Ensure dynamic elements are arranged for intuitive flow and easy customer interaction.
4. Style the Template for Your Brand:
- Adjust form widths and layouts for optimal readability and usability.
- Style buttons, headings, and content blocks to match your brand’s colors, fonts, and overall identity.
- Optionally, add extra elements like trust badges, privacy notes, or terms and conditions reminders to instill buyer confidence.
5. Set Display Conditions:
- In Bricks Builder, you don’t need to assign any display conditions for the checkout template, as this template type is automatically rendered on the correct page containing the
[woocommerce_checkout]shortcode. - Save your settings to activate the template.
6. Save and Test:
- Click Save to publish your checkout template.
- Visit the Checkout page on your website to verify that the new template appears as expected and all elements function correctly.
- Test on multiple devices to ensure responsiveness and a smooth user experience.
- Adjust styling or form arrangement as needed for clarity and efficiency.
Pro Tip: A clean, well-organized checkout page removes friction and encourages completion.
Consider simplifying the form by hiding unnecessary fields based on your product types (digital vs. physical).
Make your primary call-to-action (e.g., “Place Order”) easy to find and visually distinct.
Testing the checkout form on mobile devices ensures a smooth experience for all shoppers, and don’t forget to include trust elements to reassure first-time buyers.
Checkout Pay Template (Required)
The Checkout Pay Template in Bricks Builder lets you create a custom layout for the payment screen customers see when paying for an existing unpaid WooCommerce order.
It focuses on showing the order summary and available payment gateways, helping you build a clear, branded, and reassuring payment experience distinct from the main checkout page.
How to Set Up Checkout Pay Template:
1. Create a New Checkout Pay Template:
- Open your WordPress Dashboard.
- Go to Bricks > Templates > Add New.
- Name your template clearly, e.g., “Checkout Pay”.
- From the Template Type dropdown, select WooCommerce – Pay.
- Click Publish to create the template shell.
2. Edit the Template with Bricks:
- Click Edit with Bricks to open the builder.
- Get familiar with the Bricks interface if new.
- Design a clean, intuitive layout that highlights order details and payment options.
- Use containers and layout blocks to keep the structure organized.
3. Add Dynamic Elements:
- Add the Checkout Order Table element to display the order summary for the unpaid order.
- Add the Checkout Order Payment element to show available payment gateways and the payment button.
- Avoid unrelated cart or checkout form elements, as this template is specifically for payment completion.
4. Style the Template for Your Brand:
- Customize fonts, colors, spacing, and button styles to match your branding.
- Make the payment button prominent to guide users clearly through payment.
- Ensure responsiveness across desktop and mobile devices.
- Use reassuring and clear messaging to boost customer confidence.
5. Set Display Conditions:
- The WooCommerce – Pay template auto-applies on payment screens; no extra conditions are usually needed.
- Confirm your template is published and active.
6. Save and Test:
- Save your template in Bricks Builder.
- Test by visiting a payment link for an unpaid order to verify the correct display of order details and payment options.
- Check responsiveness and functionality on multiple devices and browsers.
- Adjust styling or layout as needed for the best user experience.
Pro Tip: Add trust signals like secure payment icons, brief instructions, or support contact info near the payment button.
Minimizing distractions on this page helps keep customers focused on completing their payment smoothly and confidently, reducing drop-offs and boosting conversions.
My Account Template (Required)
The My Account area in WooCommerce is a rich hub that lets your customers manage everything from logging in, registering, resetting passwords, to viewing orders and managing addresses.
To give this vital section a polished, branded, and seamless experience, Bricks Builder offers the WooCommerce Account Builder, a powerful tool for customizing every part of the user account journey.
This template controls the main dashboard page that your users see after logging in, featuring navigation menus to access all the important account functions.
How to Set Up Your Account Page (Parent Template):
1. Create a New My Account Template:
- Go to WordPress Dashboard > Pages.
- If the My Account page doesn’t exist, click Add New to create it.
- Name the page (e.g., “My Account”).
- Note: There is no need to create a separate template for My Account in Bricks Builder by default because it uses WooCommerce’s built-in shortcode and dynamic content.
2. Edit the Page with Bricks:
- Open the My Account page in the WordPress editor.
- Click Edit with Bricks to launch the visual builder.
3. Add Dynamic Elements:
- Add the dedicated Account Page element provided by Bricks Builder for your My Account content (navigation + content wrapper).
- Optionally, include custom headings, help messages, tips, or branded visuals to enhance user experience.
4. Style the Page for Your Brand:
- Customize colors, fonts, spacing, and layouts to align with your brand identity.
- Ensure the design is clean, readable, and easy to navigate.
5. Set Display Conditions:
- For the default My Account page edited directly, setting display conditions is not required.
6. Save and Test:
- Save your page or template changes.
- Visit the My Account page on your website to verify that the layout, elements, and branding appear as intended.
- Test functionality for user navigation and responsiveness across devices.
How to Set Up Templates for Each Account Subpage:
1. Create New WooCommerce Account Subpage Templates:
- Go to WordPress Dashboard > Bricks > Templates > Add New.
- Create a separate template for each WooCommerce My Account subpage (endpoint), naming them clearly as follows:
- Account Dashboard (For overall account content)
- Account Login & Register (For users to log in or create a new account)
- Account Lost Password (Interface allowing users to request a password reset)
- Account Lost Password Confirmation (Confirms that a password reset email has been sent)
- Account Reset Password (Enables users to create a new password)
- Account Edit Details (For changing account details like email and password)
- Account Edit Address (Let users update or add new addresses)
- Account Addresses (Allows viewing saved billing and shipping addresses)
- Account Orders (Displays the user’s order history)
- Account View Order (Shows details of a specific order)
- From the Template Type dropdown, select the corresponding template type, if available, such as:
- WooCommerce – Account – Dashboard
- WooCommerce – Account – Login
- WooCommerce – Account – Lost Password
- WooCommerce – Account – Lost Password (Confirmation)
- WooCommerce – Account – Reset Password
- WooCommerce – Account – Edit Account
- WooCommerce – Account – Edit Address
- WooCommerce – Account – Addresses
- WooCommerce – Account – Orders
- WooCommerce – Account – View Order
- Click Publish to save each template.
2. Edit Each Template with Bricks:
- Click Edit with Bricks to open the visual builder for each template.
- Get acquainted with the builder interface to efficiently add elements.
3. Add Dynamic Elements in Each Template:
According to Bricks Academy WooCommerce Account Builder Docs, add the recommended dynamic elements I shared in the table below:
Note: Must add them inside a block or div container and do not wrap them in section or container elements, as these templates render as tabs within the main account page.
| Template Name | Template Type | Required Element |
|---|---|---|
| Account Dashboard | WooCommerce – Account – Dashboard | (No specific element; use Account Page wrapper) |
| Account Login & Register | WooCommerce – Account – Login | Account – Login Form & Account – Register Form |
| Account Lost Password | WooCommerce – Account – Lost Password | Account – Lost Password |
| Account Lost Password Confirmation | WooCommerce – Account – Lost Password (Confirmation) | (Simple message; no special elements needed) |
| Account Reset Password | WooCommerce – Account – Reset Password | Account – Reset Password |
| Account Edit Details | WooCommerce – Account – Edit Account | Account – Edit Account |
| Account Edit Address | WooCommerce – Account – Edit Address | Account – Edit Address |
| Account Addresses | WooCommerce – Account – Addresses | Account – Addresses |
| Account Orders | WooCommerce – Account – Orders | Account – Orders |
| Account View Order | WooCommerce – Account – View Order | Account – View Order |
- Optionally, add headings, help text, branded visuals, or custom messages within these blocks to enhance user experience.
4. Style Each Template for Your Brand:
- Customize fonts, colors, spacing, and layout inside the blocks to match your branding.
- Maintain consistency with the main Account page styling for a seamless experience.
- Use Bricks’ responsive settings to ensure proper display across all devices.
5. Set Display Conditions:
- Unlike general templates, in Bricks Builder, you do not need to set display conditions for these WooCommerce Account templates. Each template type is automatically rendered on the correct Account endpoint page by WooCommerce and Bricks.
- This automatic rendering ensures proper template application with no manual condition assignment needed.
6. Save and Test:
- Click Save after editing each template to publish changes.
- Navigate through the My Account area on your live website to verify that each subpage loads the correct custom template as a tab within the main Account page.
- Check that dynamic content populates properly and all interactive features work.
- Test responsiveness and appearance across devices to ensure a consistent user experience.
- Adjust styling or layout as needed for clarity and engagement.
Pro Tip: Think of the My Account area as your customers’ personal control center; clear navigation and helpful information create a smooth, trustworthy user experience.
Use Bricks Builder’s modular system to tailor each account subpage with forms and data specific to that function while maintaining a consistent look and feel.
Testing both logged-in and logged-out views, plus responsiveness across devices, ensures a seamless experience everyone will appreciate.
Personal touches like welcome messages or helpful prompts can make your account area feel truly inviting and easy to use.
Thank You Page (Required)
After a successful purchase, customers land on the Thank You or Order Confirmation page.
This critical page confirms the order details and provides next steps, such as recommended products or contact information, to enhance customer satisfaction and encourage further engagement.
WooCommerce generates this page dynamically following checkout, but doesn’t assign a dedicated, customizable template by default.
With Bricks Builder, you can create a clean, branded Thank You Template that makes this moment memorable.
How to Set Up Your Thank You Template:
1. Create New WooCommerce Order Confirmation Template:
- Go to WordPress Dashboard > Bricks > Templates > Add New.
- Name your template (e.g., “Thank You Page”).
- From the Template Type dropdown, select WooCommerce – Thank you.
- Click Publish to save the new template.
2. Edit the Template with Bricks:
- Click Edit with Bricks to open the visual editor.
- Familiarize yourself with the interface before building your design.
3. Add Dynamic Elements:
- Insert the Checkout Thank You element to display purchase details like product names, quantities, and prices, payment method, address, etc.
- Add a Customer Name dynamically to personalize the page with the buyer’s name.
- Include sections for Recommended Products or Upsells to encourage additional purchases.
- Add any custom messages, trust badges, or reassurance content to build customer confidence post-purchase.
4. Style the Template for Your Brand:
- Customize fonts, colors, spacing, and backgrounds to align with your brand’s identity.
- Keep the layout friendly, welcoming, and engaging without overwhelming the customer.
- Ensure the template is fully responsive and looks great on desktop, tablet, and mobile devices.
5. Set Display Conditions:
- In Bricks Builder, you don’t need to manually assign display conditions for the thank you template because it is automatically rendered on the correct WooCommerce order received page.
6. Save and Test:
- Click Save to publish your template.
- Perform a test purchase on your WooCommerce store to verify that the order confirmation page uses the new template correctly.
- Check that all dynamic elements populate as expected, and personalized messages display properly.
- Test the template across devices and browsers to ensure a consistent user experience.
- Adjust styling or layout as needed to improve clarity and engagement.
Pro Tip: Your Thank You page is a key opportunity to leave a strong, positive impression.
Personalize it with the customer’s name and order details, and make the next steps obvious; whether that’s browsing related products, signing up for a newsletter, or contacting support.
Keep design clean and reassuring, and test it on mobile devices to ensure everyone experiences a smooth, welcoming end to their purchase journey.
Error Page (Optional)
A custom 404 Error Page enhances your visitors’ experience when they land on a broken or missing link, helping guide them back to useful content instead of leaving them frustrated.
How to Set Up Your 404 Error Page Template:
1. Create a New Error Page Template:
- Go to WordPress Dashboard > Bricks > Templates > Add New.
- Name your template (e.g., “404 Error Page”).
- From the Template Type dropdown, select Error Page.
- Click Publish to save the new template.
2. Edit the Template with Bricks:
- Click Edit with Bricks to open the visual editor.
- Familiarize yourself with the interface before designing your 404 page.
3. Add Dynamic Elements:
- Add a clear, user-friendly headline like “Oops! Page not found.”
- Insert helpful text explaining that the page may not exist or has moved.
- Include navigational elements such as buttons or links to your homepage, popular categories, or contact page for easy user recovery.
- Add a Search element to let visitors search your site directly from the error page.
4. Style the Template for Your Brand:
- Use your brand’s colors, fonts, and spacing to maintain consistency.
- Keep the layout clean and approachable to keep users engaged despite the error.
- Ensure the design is responsive and looks great on all devices.
5. Set Display Conditions:
- In Bricks Builder, click the gear icon to open Template Settings.
- Go to the Conditions tab.
- Assign this template to the Error Page condition so it applies correctly to all 404 error pages.
6. Save and Test:
- Click Save to publish your 404 error page template.
- Visit an invalid URL on your website to verify the template displays as expected.
- Test navigation links and the search functionality to ensure usability.
- Check responsiveness across desktop, tablet, and mobile devices.
- Make adjustments if needed for clarity and user experience.
Pro Tip: Your error page is a second chance to connect with visitors who’ve hit a dead end.
Use friendly language and clear navigation to guide them back on track. Including a search bar encourages exploration, reducing bounce rates.
Keep the design consistent with your brand to maintain trust, and consider adding a few helpful links or featured products to spark renewed interest.
Creating these critical templates in Bricks Builder ensures your WooCommerce store looks professional, delivers a smooth user experience, and stays fully under your design control.
Conclusion
Wrapping up, setting up WooCommerce with Bricks Builder is about more than ticking boxes; it’s about building a structure where every piece fits together effortlessly, giving both your visitors and you a smooth experience from start to finish.
We all know the key pages: Shop, Cart, Checkout, My Account matter, but the true magic happens when every page, template, and detail is stitched together thoughtfully.
It’s not just about how the store looks; it’s about simple navigation, intuitive flows, and making sure your customers can get what they came for without hitting any annoying roadblocks.
When all the right templates work in harmony, you reduce friction, build trust, and help your store shine.
So, what’s the best next step for you?
If you’re the hands-on, DIY kind of person, you can grab TrendFusion, my full-site template kit, and use this guide as your blueprint.
You’ll have everything you need to roll up your sleeves and create a full-fledged WooCommerce store with Bricks, confidently and without second-guessing what you’re missing.
But if you’d rather not lift a finger, or if you want someone who just “gets it” to build things for you or your client, we offer tailored white-label Bricks solutions.
My team and I can handle every detail, so you get a polished, professional store while you focus on what matters most in your business.
Either way, you don’t have to figure this out alone.
Whether you want to build it yourself or have us build it with you, you’ll have the tools, templates, and resources you need to make your WooCommerce setup as seamless as possible.
If you want to explore how we can help or have any questions as you build, I’m just a message away; let’s make your WooCommerce store work beautifully together.